
In this tutorial, we will review the WooCommerce Product Attributes which are extremely important for the efficient functioning of Online Stores. Product attributes will allow you to distinct your products by specifying additional information. "Attributes" are also required for variable products, they will allow you to add different variations to a specific product. Additionally, setting up your "Attributes" will allow your customers to filter your products by attributes, often achieved with "WooCommerce widgets".
In order to begin, please log in to your WordPress Admin Dashboard and navigate through the left menu bar to Products > Attributes.

Then you will be presented with the "Attributes" page where you will be able to add and manage your attributes. You will notice that at this point there are no attributes added, so let’s move forward and see how you can add your first attribute.
Within this "Attributes" page you will be able to add attributes that are considered as "global attributes" meaning they could be applied to all your new or existing products.
On the left end of the page, you will be able to locate the options you will need to configure in order to add your new attribute. Let’s take a closer look and explain each of them.
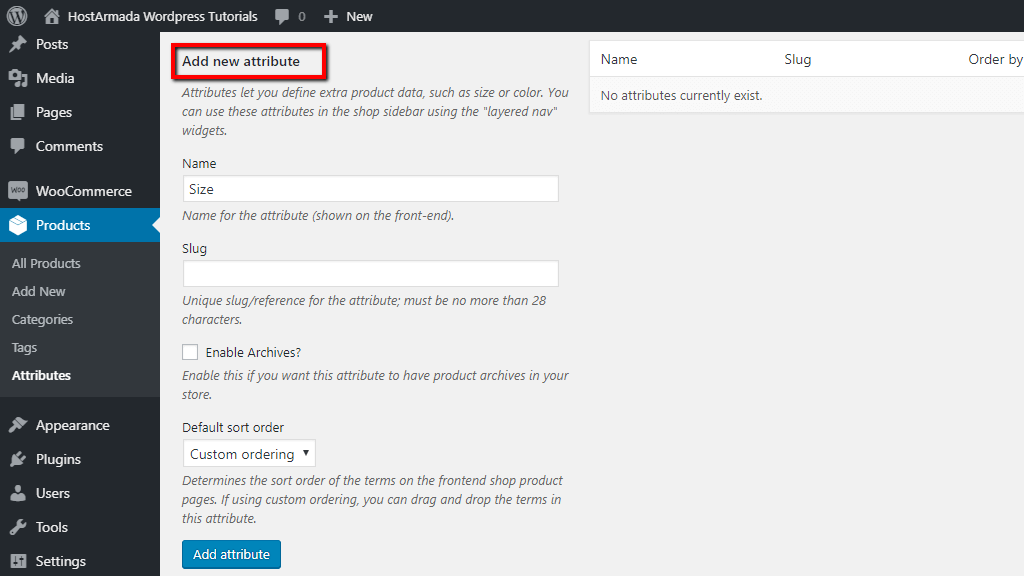
Finally, please click on the "Add attribute" button and your new attribute will be successfully added.
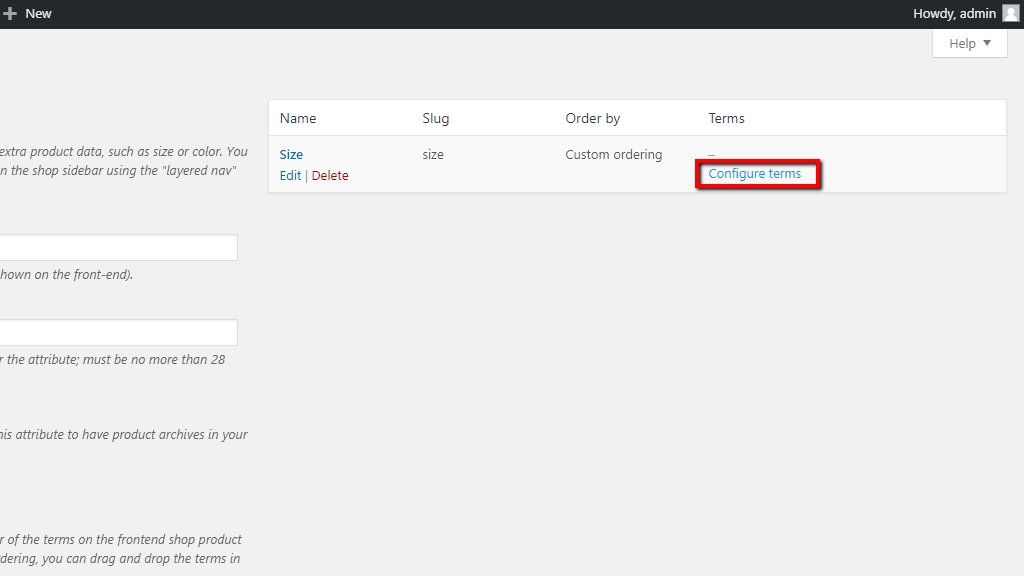
Now that you have your first attribute added, it is time to add the respectful terms to it. Please, click on the "Configure terms" button you will see listed under the attribute.
That will then display a new "Product Attribute name" (in our case "Product Size") section on the left side of the page where you will need to enter the details of your new term.

You will have to enter the "Name" of the term, in our case "Small" as it is for the "Size" attribute, give it a custom "Slug" in case you do not want to use the default slug, and optionally write a description. Then just click on the "Add new Size" button and your new term will be added to the attribute.
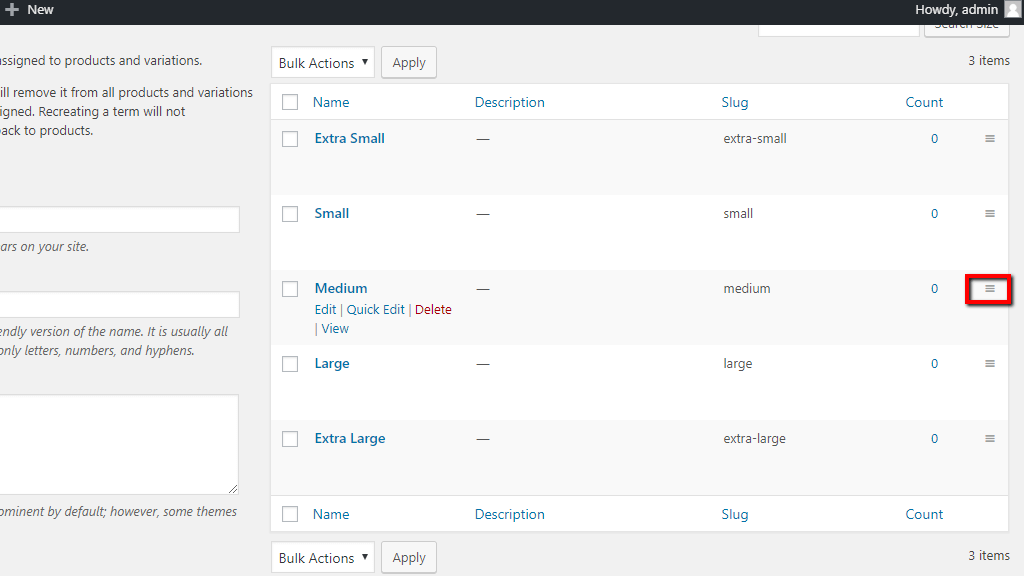
You will have to repeat the above-explained steps for all the values you would like to add to a certain attribute. As soon as you finish you will see all terms listed at the right end of the page. The order in which the terms appear here will be the same as on your store’s frontend.
In case you have selected "Custom ordering" for the attribute, you will be able to order your terms by clicking on the right handler and dragging the term to the desired position.
Once you order your terms as you desire you can go back to the "Attributes" page.
Now, whenever you are adding a new product or editing an existing one you can easily apply attribute/s and their respective value/s to your product.
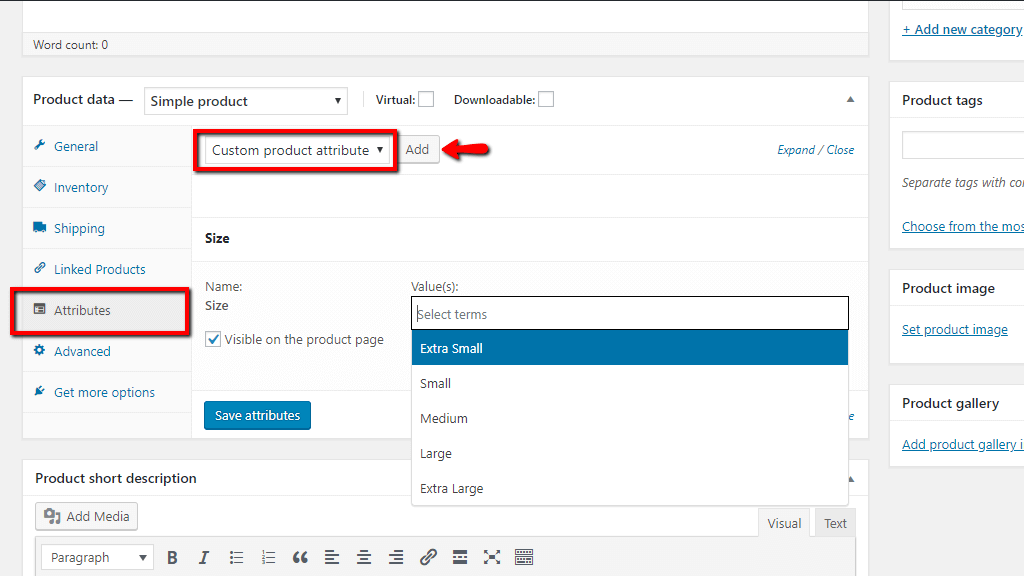
You will just have to select the attribute from the dropdown menu, click on "Add" and then select the values you would like to apply to this product from the second dropdown menu below.
Very well! Now that we have covered the "Categories", "Tags", and "Attributes" you have learned how to efficiently group and organize your products and you are ready to move forward and learn how to add them. We hope that after our guides you feel more confident in your knowledge and abilities to manage your WooCommerce online store. As always, if you have any additional questions we would like to welcome you to contact our Support Team.

Sebahat is a young and bright woman who has become an invaluable part of our team. She started as a Customer Care Representative, mastering that role and, along the way, growing into a tech-savvy individual who is well acquainted with every support layer of the company. Driven by her aim to improve our customers’ experience constantly, she is committed to enhancing the extraordinary support we deliver.
Learn more about WooCommerce in the other tutorials that we have:
